Today, we’ll show you how to install a dimmer switch from the Lutron Caseta Wireless collection. In general, installing a dimmer switch can be a pain, but not when we talk about the Lutron Caseta Wireless dimmers. In this installation dimmer guide in particular, we’ll go over a step-by-step instruction of how to replace a single-pole switch with a Caseta Wireless in-wall dimmer.
A single-pole switch is a one wall switch that controls a light or group of lights. Lights that are controlled from two or more locations, such as stair lights, use 3-way switches. If your stair light has two or more switches please check how to replace 3-way switches with Lutron Caseta Wireless dimmer installation guide. You can also check the video on how to replace a single-pole switch or 3-way switch with the Lutron dimmers.
So, let’s start!
What do I need for the Lutron dimmer installation?

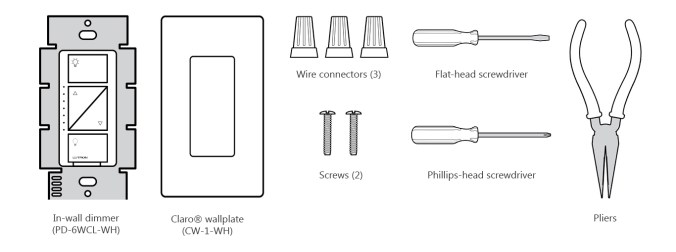
For the Lutron Caseta Wireless dimmer installation you will need: a Caseta Wireless in-wall dimmer, wire connectors & screws that come with the dimmer, a flat-head screwdriver, a phillips-head screwdriver, and pliers.
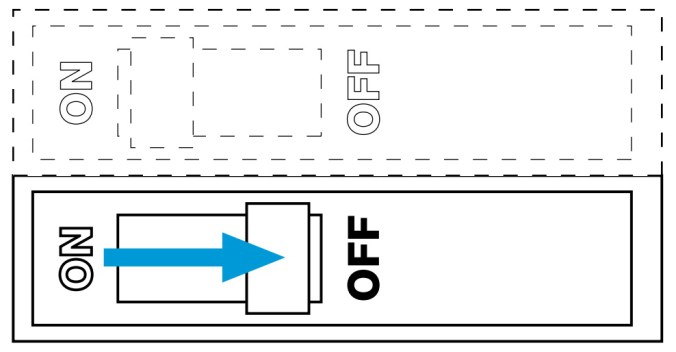
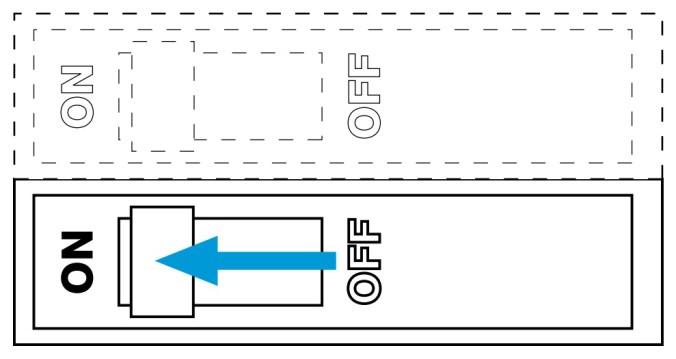
Step 1: Turn power off at circuit breaker
Before you begin, make sure to turn off power to the circuits you’ll be working on at the circuit breaker. In case you don’t know which circuit to turn off, just turn on all the lights at your home first. Then, by powering off one circuit at a time, check which lights went off. After that short test, you will know exactly which circuit corresponds to the switch you’re about to replace. In case you are still not sure, remember that you can just turn off all the circuits and power off your whole home or just call an electrician. Please keep in mind that electricity is a serious business and you can never be too safe with it.
Confirm that there is no power to the switch before continuing. One of the best ways to check the voltage in a switch is to use a test screwdriver. You can buy it or just borrow from a friend. A light on the test screwdriver will indicate if it’s safe to work with the switch.
Step 2: Remove existing switch from wall
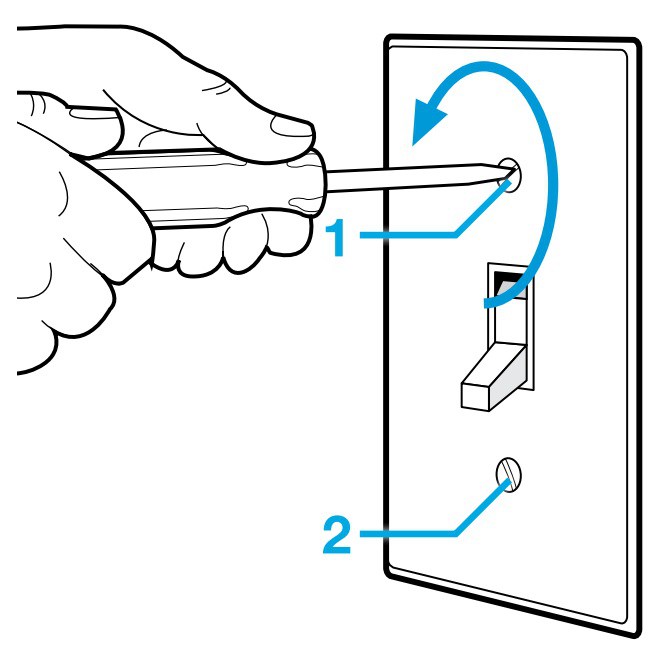
First of all, you’ll need to remove the wallplate from the switch you’ll be replacing.

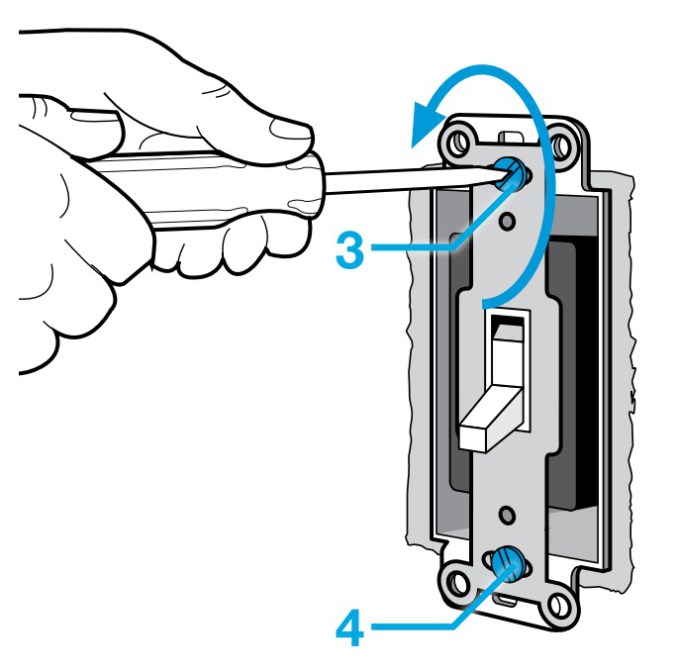
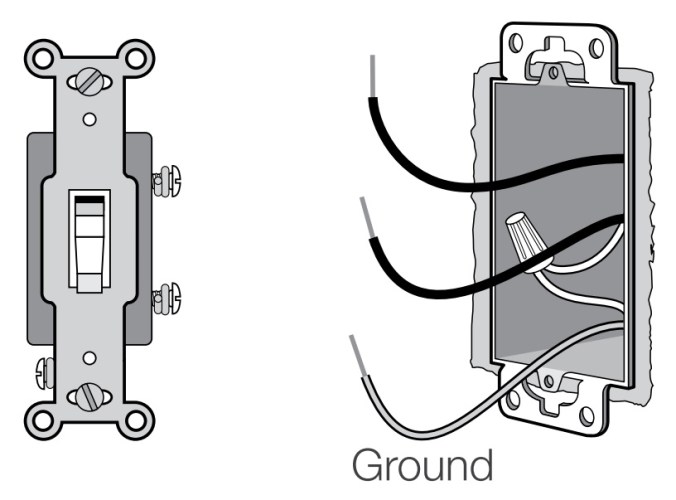
Then, remove the switch mounting screws and pull the switch away from the wall.
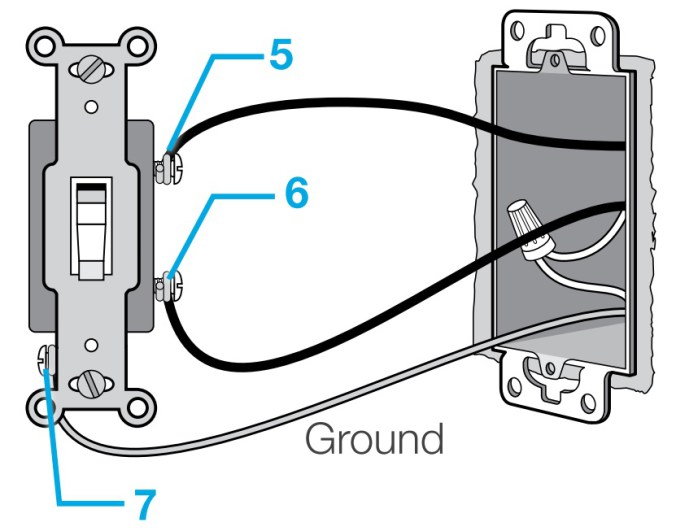
You will see three wires from your wall box connected to your switch. Disconnect all the wires from the switch by loosening the screws and unhooking the wires.
Step 3: Connect the dimmer
Now, you can install your dimmer. First, connect the green dimmer wire to the bare copper or green ground wire in the wall box using a wire connector that came with the dimmer. Twist clockwise to tighten the connector. Then, connect either of the remaining wires from the dimmer to either of the remaining wires in the wall box using a second wire connector.
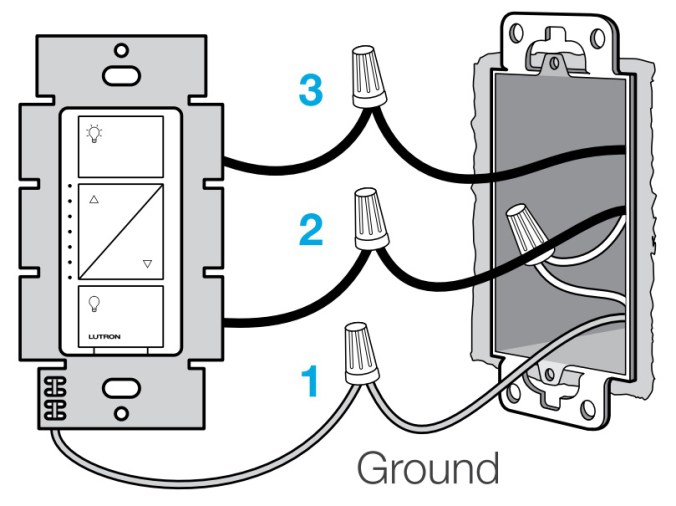
And, at last, connect the remaining dimmer wire to the remaining wall box wire using a third wire connector.
Simply tuck the wires back into the wall box and you’re ready to move to the next step.
Step 4: Mount the Lutron Caseta Wireless dimmer
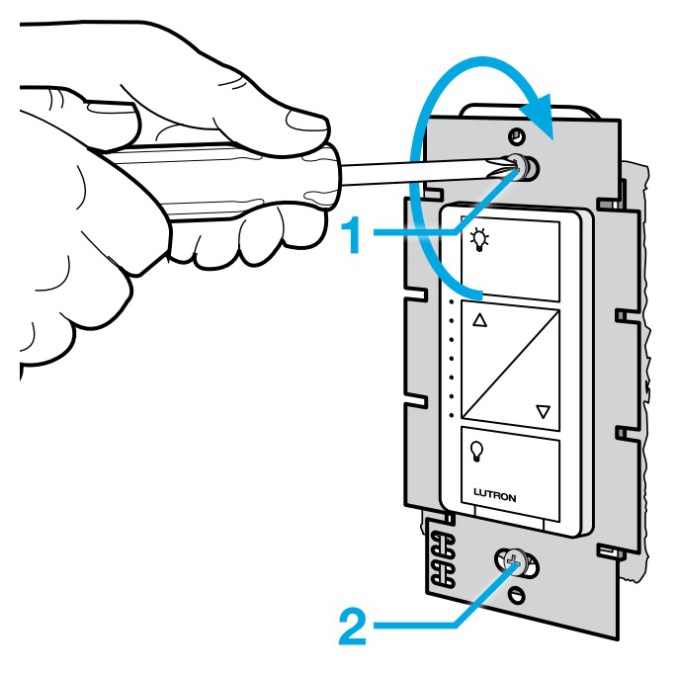
Align the Lutron dimmer with the wall box. Then, just mount it using the screws that came with the dimmer.
Now, you can replace the wall plate.
Step 5: Attach the wallplate
If you’re using a Claro screwless wallplate, first, separate the front panel of the wallplate from its adaptor. Then, place the Claro wallplate adapter over the Caseta Wireless dimmer. After that, just fasten the Claro wall adapter to the dimmer by tighten the screws included with the Claro wallplate. Then, snap the front of the wallplate into place.
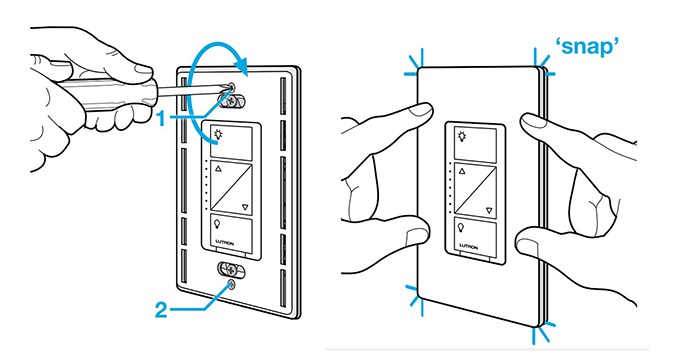
Please note that if you install the dimmer next to other dimmers or switches, you’ll need to install a wallplate with the correct size and number of opening to accommodate all the devices.
Step 6: Turn power on at circuit breaker
Finally, turn the power back on at the circuit breaker.
Please note that working with electricity is dangerous and can cause voltage stroke. Before replacing the switch, make sure you turned off the power to the switch.
Visitor Rating: 5 Stars
That looks really simple, though I’d still hire a professional 😀